Restrict Permission Midlet (java Application) on Motorola ezx phone

because of Motorola EZX phone and another java phone has a restricted permission for java application. such as cannot acces file in phone, cannot make a call, cannot use GPRS. It 's call application permission. To get a permission for file access or anothers of java application is by make java application a Trustedd for phone by send it to motorola or another verifiled company. that I don't like to do that. so I found that we can hack a java application's permission easily from ccmove.com

for Motorola A1200 and Rokr E6
First we hack for a midlet permission by
1. Goto folder .system/java/DownloadApps/MIDletXXXXX/Files where XXXXX is a midlet runing number. and check for file .jar and .jad that this is a right midlet to be hack a permission.

2. go upper 1 folder to .system/java/DownloadApps/MIDletXXXXX/ and edit registry.txt in lines


Is-Trusted: 0 to Is-Trusted: 1
Domain: Untrusted to Domain: Manufacturer


or


Domain: Untrusted to Domain: Trusted Third Party


PS. becareful if going into this folder by telnet. try copy registry to edit in PC and copy it back.


after this we got a permission. but we need to manage it by
1. Manage midlet permissions by tap and hold on midlet icon
2. select Manage.
3. select Permissions.
4. set permissions that you want to use to Never Ask for Manufacturer domain or Ask once per application for Trusted Third Party.


for Motorola E680i and A780 try looking for here nowGoogle.com adalah Multiple Search Engine Popular

replace permfile.txt in installed folder of midlet with this one.
1permfile.zip
Posted on 11:25 PM / 0 comments / Read More
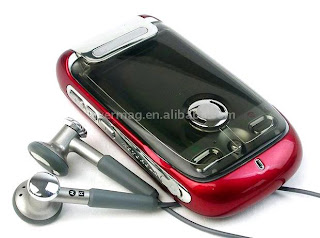
Backup & Restore Motorola A1200 / Rokr E6

Motorola_A1200
Backup & Resotre Now is use for backup your contacts, sms, email, calendar, and work, and another data that are in main database of your phone by compress it and save into MemoryCard.

Requirements.
1. Mpkg installer to install this application.
2. showQ.pkg to display message on screen.

Installation procedure.
1. install backup & restoreNow by mpkg installer
2. install showQ if doesn't have it.


How to Backup your data.
1. tap on Backup Restore Now icon to start application.
2. tap on Backup button to start backup.
3. tap on OK button to confirm backup data.
4. after backup complete dialog "Backup complete!" appear. your data should be backup into PIM.brn in folder Backup in memory card.

** Backup & Restore Now will move previous backup file into PIM1.brn, PIM2.brn, ... and it does not delete previous backup files. you should take care of this yourself.
** after that you can rename backup file or move it to anywhere.

How to fast restore lastest backup data.
1. tap on Backup Restore Now icon to start application.
2. tap on Restore button to start restore data.
3. tap on OK button to confirm restore data.
4. after restoration complete dialog "Restore complete!" appear. restart phone to get your data back.

How to Restore your any backup data.
1. goto backup folder that you keep a backup file (*.brn)
2. tap and hold on backup file until popup menu appear .Select Openwith menu and choise Backup & RestoreNow.
3. for security and miss tapping you should not check on 'use this program to open' box. and tap on ok button. dialog "tap on backupfile again to confirm a restore process" will appear. tap on ok button to close dialog.
4. tap on OK button to confirm restoration. you 'll see message "Start restore your addressbook, sms, mms, and email, calendar and work."
5. after restoration complete dialog "Restore complete!" appear. restart phone to get your data back.

About Backup & Restore Now.
- It's only compress main.db, mms, and email folder by tar and gzip into MMC. so It's cannnot syncronize any data.
- It's may not work with backup and restore from and into diffenrent firmware or phone model.
you can find another here nowGoogle.com adalah Multiple Search Engine Popular

NO WARRANTY AND USE IT WITH YOUR RISK

Download
BackupRestoreNow_A1200_E6_1.2.zip
Posted on 11:32 PM / 1 comments / Read More

Modify Boot Image Hellomoto when phone power on

motorola boot imagesimple tutorial on how to modify rokr e6 or motorola A1200 (that call motoming) Boot Image Hellomoto when phone power on. Boot Image is a first image that appear before splash animation display when power on phone. It is a GIF 89a image encoded to smg file. pack/unpackBootImage.pl is perl scripts that use to packing and unpacking gif image from and into smg file.

Requirements.
1. Perl Interpreter from ActivePerl

How to unpack bootimage.smg to gif image.
1. rename cg file to bootimage.smg
2. put pack/unpackBootImage.pl into the same folder as bootimage.smg.
3. double click on unpackBootImage.pl to extract smg file.
4. 2 files should apprear in bootimage folder. bootimage.gif and cgversion.txt bootimage.gif is a gif image file. cgversion.txt is a text file that indicated version of your cg.

How to pack gif image to bootimage.smg
1. check in bootimage folder that It have bootimage.gif and cgversion.txt.
2. double click on packBootImage.pl
3. new bootimage cg file should be in new_bootimage.smg.

PS. you can get bootimage.smg from firmware by use sbf codec extract cg39 from E6 and A1200 f/w.

Download
BootImagePackager_1.0.zip
Posted on 11:38 PM / 1 comments / Read More

modding Sony Ericsson Jalou


gogling and googling and i found the SE Jalou (call)..
hmm..beatiful phone.

Sony Ericsson
announced the Jalou, their newest mobile phone featuring the latest in fashionable design. The typical technical specs are all there including 3G, 3.2 megapixel camera, Bluetooth, etc; but what sets this clamshell phone apart is a highly fashionable “bling” design, as one can see from the facet-cut diamond face. Not only that but a Dolce & Gabbana special edition will be available, featuring 24carat gold plating. just waiting for modding Sony Ericsson Jalou
Posted on 8:24 PM / 0 comments / Read More

Motorola Rokr E6 Transformer Modding

The Motorola Rokr E6 Transformer

rokr e6 transformer

Transformer mania has officially taken hold of the world. The Optimus Prime Case Mod should have been a clear warning of what was to come. And now, a clever Motorola Modders has turned his MOTOROKR E6 into a fully functional transformer cellphone.

Whoever could have predicted that a camera phone lens could work so well as a robotic head? This bad ass mod is sure to light a fire of envy under the asses of those who have wanted to create a truly elite phone mod. Bow down and weep, bitches. More after the jump.

motorola

07.jpg

08.jpg

rokr e6


Posted on 11:30 PM / 0 comments / Read More

Application For Motorola Q

Free Application For Motorola Q based. just download and start to browsing the web.
for modding just click here

DOWNLOAD LIGHTNING FAST MOBILE BROWSING

* Routinely loads pages at least 25%-50% faster than competing mobile browsers
* Patented navigation and display technologies get you where you're going faster

WATCH. CONNECT. SURF.

* View streaming videos from sites like YouTube, MySpace and Google
* Enjoy full desktop PC-style Facebook and social media functionality
* Subscribe to RSS feeds
* Shop securely
* Browse any website

UNCOMPROMISED WEB EXPERIENCE

* Full desktop PC-style browsing on all types of mobile phones
* Web content is never reformatted, repurposed, or removed

Installation:
1) Install JBED or similar Java Emulator
2) Unzip jad file to your phone
3) Run Java emulator and have it search for and install bolts2.jad file

------------------------------------------------------------------------

Opera Mini 5 beta

Top new features


Tabbed browsing
Browse several Web sites at the same time. Jump easily from one to another.


Speed Dial
Your favorite sites are just one click away.


Touch & Keypad
The interface optimizes the display for both touchscreen and keypad phones.


Password manager
Log on to your e-mail, social network and other sites with just one click.

Download "Opera Mini 5 Here"

Installation Instructions:
Opera Mini is a Java Application and requires you to install a Java Emulator first. This is because Java is not a native application of the Motorola Q.
  1. Download "Cloudyfa Esmertec" JBED Java emulator and install it first.
  2. Download the above posted zip file and unzip it.
  3. Use ActiveSync to explore your phone and copy the jad and jar files to your phone (for instance, My Documents or Storage card)
  4. Open JBED and install the files: Menu - Install - Local Files. It should automatically find Opera Mini
-----------------------------------------------------------------------

UCWEB Browser

a (new) Mobile Browser is out, its called UCWEB. It is very stable so far it is very fast, has more options then Opera mini. It works with Google (like Googles new "my location" feature on mobile search, GMail . its fast in rendering (it renders pages on the device not a remote server) pages and gives you the option of preformating to your devices screen size.

Download UCWEB Browser

A quick feature summery:

Main Features:
• FREEWARE
• Adaptation for small screen
• Data traffic statistics
• Visited history
• Domain name quickly input
• Supporting multi-formatted file
• Supporting web local-storage
• Multi-windows browsing
• Page dynamic optimization
• Picture optimizing display
• Shortcut Keys (user defined)
• RSS Feed Subscriptions
• Built in E-mail Client for POP3 and IMAP, full support for attachments
• Comprehensive search features (user definable)
• Download Manager - Resume broken download connections
• Personal Data Manager - Saves web sites to your device, export bookmarks


We will update anything for moto Q application, just wait for update. thanks
Posted on 12:58 AM / 0 comments / Read More

Motorola Q registry tweaks - Update

this post an update from last moto Q tweak
You will need a registry editor like Resco Registry Editor and Explorer: Resco Explorer 2005 for Smartphone

And as with most posts of this nature, tweak AT YOUR OWN RISK!
need the Motorola Q USB Driver?? Just Download Here

The following is a list of mods/hacks that you will find thereafter:
1. Making the scrollbars smaller (Vert. and Horz.)
2. Moto Q Speed Increases
3. Changing System Startup Sound
4. Turn off Shutter Sound for Camera
5. Change Start Menu into List Instead of Grid
6. Shut Off the Beep that Occurs When You Initiate a Call
7. Page Up and Page Down in IE
8. Change VZW Image that is Above the # Dial Window
9. Change Startup Microsoft Splash Screen
10. Remove Sent Message Popup With SMS.
11. Increasing Call History

1. Making the scrollbars smaller (Vert. and Horz.)

This hack allows 4 icons on a row in the start menu instead of 3 and allows more to be viewed on the screen in IE:
• Go to: HKey_LOCAL_MACHINE\SYSTEM\GWE\
• Adjust the following values
cyHScr : Horizontal Scrollbars
Height in pixels (default is 6, set it to 3)
cxVScr : Vertical Scrollbars
Width in pixels (default is 6, set it to 3)
• Soft-reset


2. Moto Q Speed Increases


The following 2 hacks increase system performance and makes the Q more responsive:
• Navigate to: HKEY_LOCAL_MACHINE\SYSTEM\GDI\GLYPHCACHE\
Changed limit from 16384 to 32768
• Navigate to: HKEY_LOCAL_MACHINE\System\StorageManager\FATFS
Changed - CacheSize to 4096


3. Changing System Startup Sound
• Navigate to: \HKEY_CURRENT_USER\ControlPanel\Sounds
- At the very bottom of the list of entries, there an entry called AllSounds
- Open that up and you'll see a list of mp3 files.
- All you have to do is append your own audio files (mp3, wma, or wav) to the list. Then you have to make sure that you place your new audio clips in the \Windows folder so that they are accessible.
- The next time you go to the sounds events page, the drop down menu will contain the new clips you added.
• If you want to change the system startup sound, go to:
\HKEY_CURRENT_USER\ControlPanel\Sounds\SystemStart \Sound
- Change the hidden wav file, \Windows\Piano.wav to \Windows\MY_WAV_GOES_HERE.wav
- I'd be really cautious about changing the startup wav. You don't want the phone to lock if the audio file doesn't load. I converted my wav to 16bit, stereo, 22khz WAV file. I didn't use mp3 or WMA. This seems to work fine.


4. Turn off Shutter Sound for Camera
• Navigate to:
\HKEY_LOCAL_MACHINE\System\Pictures\Camera\OEM\Sou ndFile
• In the SoundFile key:
Modify the string/value \windows\shuttersound_02_secs.wav to say \windows\*none*
- Yes it should have the ** around none


5. Change Start Menu into List Instead of Grid
• Navigate to:
\HKEY_CURRENT_USER\Software\Microsoft\Shell\StartM enu
• Change the GridView value to 0 if you want list view.
• Change it to 1 if you want grid view.


6. Shut Off the Beep that Occurs When You Initiate a Call
• Navigate to:
HKEY_CURRENT_USER\ControlPanel\SoundCategories\InC all2
• Change String/Value InitVol to 0


7. Page Up and Page Down in IE


Key mapping for "Page Up" and "Page Down" in Internet Explorer
• Open your favorite registry editor then navigate to HKEY_LOCAL_MACHINE\Software\Microsoft\Internet Explorer
• Create a new key 'KeyMaps' (without the quotes)
• Under KeyMaps, create 2 new DWORD values:
50 with a value data 1 (this will make key "2" Page Up)
56 with a value data 2 (this will make key "8" Page Down)
- I created 2 more DWORD values:
52 with a value date 5 (this will make key "4" Page Left)
54 with a value date 6 (this will make key "6" Page Right)
The key name is the keycode you want. 50 = Key 2, 56 = Key 8, 52 = Key4, and 54 = Key
• Other DWORD values available are:
1 - Page Up
2 - Page Down
3 - Top
4 - Bottom
5 - Left
6 - Page Rignt
7 - Horizontal Top
8 - Horizontal Down
9 - Default Layout
10 - Desktop Layout
11 - One Column Layout
12 - Full Screen Toggle
13 - Show Pictures Toggle
Keycodes Values for 0-9: 48='0', 49='1', 50='2', 51='3', 52='4', 53='5', 54='6', 55='7', 56='8', 57='9'.
• Exit registry editor once you have mapped it to your favorite keys.


8. Change VZW Image that is Above the # Dial Window

When you go to dial a # you will see a Verizon Wireless Image above that #.


To get rid of this or to change it...

• Upload the desired image to /windows.
The default VZW image is 240x27. However the author, tonyxcom, says: "Oh, and you can pretty much make the image any size you want. I made mine 320. If you make it any less wide, it will get stretched."
• Navigate to:
HKLM/Software/Microsoft/Shell/Rai/:MSCdial/
Click on the String/Value BannerImage
You will see in the String: /windows/16_brick_131.gif
Type in the string field: /windows/YourImagesName.jpg
YourImagesName.jpg being the name of the file you put in the /windows folder in Step 1.

Someone named Ben Hirashima has an auto installing CAB file for this hack. It can be downloaded at Here


9. Change Startup Microsoft Splash Screen

The file that we are dealing with is "ms_screen.png". The system uses this file for both the startup and shutdown screens. There are 2 ways to do this mod. The first is to create another image file named ms_screen.png, and move it into your windows directory. Of course it will need to be 320x240, and I would save in PNG format just to be safe. Be sure to make a backup of the original just in case you happen to botch something.
The method that I chose was to create a PNG file, again 320x240, and save it under a different filename. Then, move this file into the Windows directory. Now it's time to edit the registry to point to this new file.

The registy keys are located at: HKEY_LOCAL_MACHINE\Software\Microsoft\Splash Screen
We are interested in the CarrierBitmap, MSBitmap, and MSShutdownBitmap keys. They point to the \Windows\ms_screen.png file by default. Change all 3 to the new filename, and restart the Q. You should see your new startup logo after the Verizon logo and animations, prior to your Home screen coming up.


10. Remove Sent Message Popup With SMS.
• Navigate to: HKEY_LOCAL_MACHINE\SOFTWARE\Microsoft\Inbox
• Next, click on Inbox (make sure the Inbox is highlighted) and select Edit, New Key
• Name the New Key as "Settings"
• Click on "Settings" (make sure the Settings is highlighted) and select Edit, New String Value
• On "Value name:", key in SMSNoSentMsg and in "Value data", key in 1
• Soft reset your device and test it with one SMS, and you will notice that the SMS Sent bubble is being disabled


11. Increasing Call History
• Navigate to: \HKEY_CURRENT_USER\ControlPanel\Phone
"CallHistoryMax" contains the number of numbers that will be kept in history. [ie. change it to 100]


[Here is one that I didn’t venture to try: ]

USB Native Tethering, Make DUN Settings Stick• To make the DUN setting (##342587) stick, do the following delete the following string value: HKey_Local_Machine\init\"Launch99"
• Exit regedit, dial in ##342587. Select OK, then Exit.
• Reset your Q.
Upon restart, the Modem Link app will be there indefinitely, lest you do the ##342587 again and disable it.
NOTE: Unless you take certain measures your phone can lock up 80% of the time.

Thanx Guys On The Forum
Posted on 11:59 PM / 0 comments / Read More

Iphone Applications Using Cydia

Iphone Applications
You can get free iphone crack games and applications from here

1- Winterboard: This appliacation use for setting for your wallpapers, themes.

Just like themes for your icons, keyboard themes etc
Installation: For Installation simply go to Cydia and then go to search and Type WinterBoard and Install the Winterboard.

2- Category: If you want to resides the games, application, utilities and setting icons in seperate folders. Then you have to need install this application which name is "Category".
This appliacation allow you to make different folders and also allow you to add them the applications

For install this package: Open Cyida and then search and type there "Category" and Install this package.

3- OpenSSH: This application allow you to connect your iphone or ipod with your laptop or Desktop PC.
this utility must for connection. without install it you cant make connection with your laptop or pc.
For install this package: Open Cyida and then search and type there "OpenSSH" and Install this package.

4- BitsSMS: Default sms application in iphone cant allow you to forward the messages to multiple contacts. Through this appliaction you can forward the sms messages to multiple contacts


5- Insomnia: This Application allow you to connect wifi for long time. Such as when you want to download the heavy file then this software make your wifi connection active

For install this package: Open Cyida and then search and type there "Insomnia" and Install this package.

6- BossPrefs: This Application allow you to customize your desktop. such as if you want to hide some icons from your desktop.

For install this package: Open Cyida and then search and type there "BossPrefs" and Install this package.
Posted on 10:24 PM / 0 comments / Read More

Make Full Flash with SE Tool 2 Lite

se tool 2 lite

Here is described, how to make a full flash with SETool 2 Lite and How to apply or remove patch. on sony ericsson

DOWNLOAD SE Tool 2 Lite 1.10 (you can Use Google to Find out)
Upgrade from 1.10 to 1.11:
SETool 2 Lite 1.10 to 1.11 update (you can Use Google to Find out)
USB Flash Driver (download here)

below is step to guide, so read carefully

1. Back-up your GDFS file and write your GDFS.

Quote:
Look to the left column and down you will see a button called “Read GDFS”. Click it, and then hold down the C button on your phone, and then plug in the cable. Eventually it will get to a point , where it says “PROGRAMMING FLASH”. Once it says Unplug the cable , then Unplug your phone, take the battery out, put the battery back in, hold down C, press the “READY” button, then plug the phone back in, BUT right after you plug it in, about 2 seconds after or so, release the C button. SETool 2 Lite will now read the GDFS and then it will say “Getting GDFS Chunk” , and then once it has fully read your GDFS, you can click “Quit”.Take the battery out for about 20 seconds, and then put it back in.

"Write gdfs" will write gdfs to phone in BINARY format. File selected in "MISC. Box" will be assumed as gdfs in binary format.
2. Flash your phone using SETool 2 Lite

Quote:
Step 1: Shut down your phone and open SETool 2 Lite.
Step 2: Choose your phone model.
Step 3: Press the ADD button and select the Main&FS files (.mbn & .fbn). MAIN and FS can also be bin files. In fact the only important thing is that, they're unencrypted.
Step 4: Select the archive with the customization files (.zip).After it is recognized by the program , in the left side will appear informations about the customization.The archive(.zip) contain files from tpa/preset/custom.
Step 5: Press the FLASH button.
Step 6: Connect the usb cable while holding down the "c" button un your phone. Then wait for the process to finish.
Step 7: Disconnect your phone , get the battery out for 5 seconds , reintroduce it and start up the phone.It will appear a screen with "Please Wait...", wait 1-2 minutes and then the phone will start normally.
se tool 2 lite

that is,, hope you enjoy and nice days
Posted on 12:47 AM / 0 comments / Read More

Download Sony Ericsson Driver

Here Driver for Sony Ericsson Free to Download, we update as soon as posible, make sure your phone driver is list below, truly this driver is the same for sony.
free download SE driver

FREE DOWLOAD

K550i USB DRIVER

K310 USB DRIVER

K530 USB DRIVER

K320 USB DRIVER

K610 USB DRIVER

D750 USB DRIVER


Posted on 11:06 PM / 0 comments / Read More
 
Copyright © 2011. Hellomotto . All Rights Reserved
Home | Company Info | Contact Us | Privacy policy | Term of use | Widget | Blogger Nusantara Blogpreneur Indonesia