Showing posts with label Modding. Show all posts

Resolving Battery and Power issues

Moto Modding just give the tips for Resolving Battery and Power issues on general Handphone Gadget on the world, so keep reading may usefull that Hellomotto giving to people below.

"Talk" time is based on continuous voice only usage (not including Bluetooth), without any data, advanced features, or messaging.
"Standby" time is based on the length time a device stays powered on (starting with a fully charged battery) without any voice, data, advanced features, or messaging usage.
Battery overheating
Lack of battery power
Issues affecting a battery's charge
Tips for better battery life
Accessories
Using the proper battery charger

Battery overheating
For important procedure information please refer to Overheating of Devices.
Normal battery expectations

* Warm to the touch while in use.
* Warm to the touch while charging battery.

Battery issues requiring attention

* Excessive heat or too hot to the touch.
* Swelling or rupture of the battery or phone.

Lack of battery power

1. Remove the battery from the device to ensure there has been no water damage.
If there has been water damage, let the device dry with the battery separated from the device for several days.
2. Ensure the battery has no corrosion on its contacts and that it fits securely on the device.
3. Replace the battery onto the device then ensure the battery is charged.
4. Ensure the correct key is being pressed for powering the device on.
5. Ensure the device is properly connected to a power source (e.g. - AC adapter, car charger).
6. Attempt to power on the device while it's connected to the adapter / charger.
7. Attempt to power on the device using a different manufacturer approved battery (if available).
8. Verify the device charging indicator and any indicator on the charger are signaling that a charge is occuring.

Issues affecting a battery's charge

* Signal strength and coverage.
o Switching between EVDO and 1XRTT
o Switching between Verizon Wireless and Extended Network
o Roaming
* Battery age.
o Verizon Wireless recommends replacing the battery with a new manufacturer approved battery once per year
* Lack of use.
* Non-voice services usage.
o V CAST Video
o Mobile TV
o V CAST Music with Rhapsody
o VZ Navigator
o Push To Talk
o Mobile Web
o Media Center (Get It Now)
o Messaging (TXT / PIX / FLIX / Mobile IM / Email)
o Bluetooth
o Speakerphone


Tips for better battery life

* Follow the manufacturer's instructions for properly charging the device.
* Do not store the device in direct sunlight or hot locations.
* Do not rely on the device's vehicle power adapter as the battery charger for the device.
The vehicle power adapter is meant to be a temporary low battery level solution until the device can be properly charged.

Accessories

* Extended Life Battery
* Vehicle Power Adapter
* Travel Charger

Using the proper battery charger
Using a battery charger other than the one specified by the device manufacture may result in the error: "Unauthorized Charger" being displayed as well as possibly causing damage to the device. Once the incorrect battery charger is unplugged from the device the error should go away. If the error does not go away then unplug the charger from the device, remove then reinsert the battery. Only the battery charger specified by the device manufacturer should be used to charge the battery.
Posted on 1:35 PM / 0 comments / Read More

Panasonic Pinout Scheme | Modification Panasonic Phone

panasonicwe post again. if you are an panasonic phone user you should know about your handphone and try to solve the panasonic problem you have, so today we are talking about Panasonic Pinout. below are all the type of panasonic pinout you must know.
try with your risk and we just share something that we know, hope this pinout scheme make you more to know secret of the panasonic phone.


Panasonic GD53, GD67, GD68, GD92, GD93, GD95, GD87, GD87e, GD88, GU87 cell phones cable connector pinout


1 ADND -?-
5 TEST -?-
7 RX <-- 8 TX -->
13 Vcharge -?- +5V?
14 GND


Panasonic P341i, X11, X70, X80, X88 cell phone pinout


2 Vcharge +5V?
12 Tx
13 Rx
1,14 Gnd


Panasonic G400-600 cell phones cable connector pinout


16 GND --- Ground
15 TX_Audio ?
14 AGND --- Audio_Ground
13 HF_ON (L=ON) L=H/F ON
12 AOP_Sense Data Adaptor Select
11 Serial_Up Rx UART up (9600,33.8kbps)
10 Serial_Down Tx UART down
9 External_Power POWER FOR CHARGING
8 Ground
7 RX_Audio
6 Radio_Mute L=MUTE
5 HF_Sense L=H/F MODE
4 Reserved L=FLASH WRITE ENABLE
3 Ignition H=ON
2 Logic_Power H=HANDSET ON
1 PAON Power Amplifier Control Signal


Panasonic G50, G51, G70, A100, A101, A102, X300 cell phones cable connector


4 Gnd
3 RxD
1 TxD


Panasonic G60, X100, X500 cell phone pinout


14 DLPWR Remote Power ON (IN)
13 Tx_IrDA Transmit Data (OUT)
12 SDO Data Out (OUT)
11 Rx_IrDA Receive Data (OUT)
10 CTS_MODEM/SDI CTS / Data IN (IN)
9 RX_MODEM Receive Data (IN)
8 TX_MODEM Transmit Data (OUT)
7 RTS_MODEM/nSCS1 RTS / Chip select1 (OUT)
6 DSR_MODEM DSR (IN)
5 DTR_MODEM TPU in WATE Mode (IN)
4 ACC_PWR Power Supply (IN)
3 VACCID Analog Input (IN)
2 SCLK Serial Clock (OUT)
1 DGND Power Supply and Digital GROUND (GND)


Panasonic GD30, GD50, GD70, GD90 cell phones cable connector pinout


1 GND -?-
2 TX_AUDIO -?-
3 GND -?-
4 nHF_ON -?-
5 NADP_SENSE -?-
6 RX <-- SERIAL_IN 7 TX --> SERIAL_OUT
8 Non Hook -?- NON_HOOK
9 EXT_POWER -?-
10 N/C -?-
11 RX_AUDIO -?-
12 NRADIO_MUTE -?-
13 NHF_SENSE -?-
14 Vbat -?-
15 TEST SHORT (ignition) -?-
16 Logic PWR -?-
17 Pa On -?-
18 GND

Panasonic GD35 cell phone pinout


3 Rx
4 Tx
5 GND
5,6,7 batt pins


Panasonic GD55 cell phone pinout


1 Rx
2 Gnd
3 Tx


Panasonic VS2, VS3, VS6, VS7, MX6, MX7, SA6 port pinout


1 Gnd
2 USB D+ connected with PC USB D+ (pin 3) in USB data cable
3 USB D- connected with PC USB D- (pin 2) in USB data cable
4 USB Vbus connected with PC USB Vbus (pin 1) in USB data cable
7 Rx at least for VS2, VS3
9 Tx at least for VS2, VS3


Panasonic X60, X66, X200, X400 cell phones cable connector pinout


3 GND
1 Tx
2 Rx


Panasonic X700 usb cable pinout


3 Vbus connect to PC USB pin 1 in cable
5 USB DATA- connect to PC USB pin 2 in cable
4 USB DATA+ connect PC USB pin 3 in cable
14 GND connect PC USB pin 4 in cable

and if you wanna try read other handphone modification just click here

update:
Moto modding now focus on contes seo call nowGoogle.com adalah multiple search engine popular so we soon update the new fresh of modding phone sources, so thanks for attention
Posted on 6:12 AM / 0 comments / Read More

Free Sony Ericson Theme Download

This is simple 176x220 Theme Sony Ericsson Free to Download, we update more theme as soon as posible to people who love Sony Ericson Brand. stay to update more theme

Theme name Apple Theme
Animated Yes

SE Theme
download themeTheme name Citroen
Animated Yes

Citroen themedownload theme
Theme name Silver-Obit
Animated Yes

download theme
Posted on 10:31 PM / 0 comments / Read More

Step by Step Modding Rokr E6

i just update little basic instruction on Modding Rokr E6

modding ROKR
This guide will teach you how to flash/flex your Motorola ROKR E6 using RSD Lite. before that, did you has read Rokr E6 Transformer?? see here

Start your phone up in boot loader mode. To do this, hold down the camera button (top on the right side of the phone) and the Red power button at the same time. Your phone will boot up with a red screen which will say something similar to:

FLASH_KEY_PRESS
Boot Module:
BOOT_G_00.02.21P_MACAU

MBM FLASH MODE


Now, connect your phone to your PC. You will see a Found New Hardware message with the Motorola Flash Interface, and perhaps a couple others.

Assuming you installed the drivers in the Get Connected section, you will then see the Your new hardware is installed and ready to use. message. If not, point Windows to your P2k drivers on the comp.

Open RSD Lite. I am using RSD Lite 3.5 in this tutorial, but I'm fairly sure anything 3.0 and up will work, maybe even previous versions. You should see a Model of NS Flash Bulverde and it should say Connected....

Click the ... button by the Filename menu and navigate to your firmware version you are installing. In this tutorial I am flashing R533_G_11.12.08P. (If you'd like to know what version you have, click here to find out how.) Once you have the file selected (make sure its unrar'ed), click Start.

Your phone will now look like it is off. Its not, don't worry--there just isn't any screen which indicates your upgrading the software. Watch RSD Lite as it goes through its motions so you know where you're at in the process. The entire process of the flash took me about 10 minutes, give or take.

The phone will hang out at 99% for a long time--over a minute for mine. Don't worry, its fine. It will then reboot, and go through another few processes.

Assuming all went well, you will then see a PASS in RSD Lite. you can search by nowGoogle.com adalah Multiple Search Engine Popular


Congrats! You have successfully flashed your Motorola ROKR E6!
Posted on 10:56 PM / 2 comments / Read More

Restrict Permission Midlet (java Application) on Motorola ezx phone

because of Motorola EZX phone and another java phone has a restricted permission for java application. such as cannot acces file in phone, cannot make a call, cannot use GPRS. It 's call application permission. To get a permission for file access or anothers of java application is by make java application a Trustedd for phone by send it to motorola or another verifiled company. that I don't like to do that. so I found that we can hack a java application's permission easily from ccmove.com

for Motorola A1200 and Rokr E6
First we hack for a midlet permission by
1. Goto folder .system/java/DownloadApps/MIDletXXXXX/Files where XXXXX is a midlet runing number. and check for file .jar and .jad that this is a right midlet to be hack a permission.

2. go upper 1 folder to .system/java/DownloadApps/MIDletXXXXX/ and edit registry.txt in lines


Is-Trusted: 0 to Is-Trusted: 1
Domain: Untrusted to Domain: Manufacturer


or


Domain: Untrusted to Domain: Trusted Third Party


PS. becareful if going into this folder by telnet. try copy registry to edit in PC and copy it back.


after this we got a permission. but we need to manage it by
1. Manage midlet permissions by tap and hold on midlet icon
2. select Manage.
3. select Permissions.
4. set permissions that you want to use to Never Ask for Manufacturer domain or Ask once per application for Trusted Third Party.


for Motorola E680i and A780 try looking for here nowGoogle.com adalah Multiple Search Engine Popular

replace permfile.txt in installed folder of midlet with this one.
1permfile.zip
Posted on 11:25 PM / 0 comments / Read More

Backup & Restore Motorola A1200 / Rokr E6

Motorola_A1200
Backup & Resotre Now is use for backup your contacts, sms, email, calendar, and work, and another data that are in main database of your phone by compress it and save into MemoryCard.

Requirements.
1. Mpkg installer to install this application.
2. showQ.pkg to display message on screen.

Installation procedure.
1. install backup & restoreNow by mpkg installer
2. install showQ if doesn't have it.


How to Backup your data.
1. tap on Backup Restore Now icon to start application.
2. tap on Backup button to start backup.
3. tap on OK button to confirm backup data.
4. after backup complete dialog "Backup complete!" appear. your data should be backup into PIM.brn in folder Backup in memory card.

** Backup & Restore Now will move previous backup file into PIM1.brn, PIM2.brn, ... and it does not delete previous backup files. you should take care of this yourself.
** after that you can rename backup file or move it to anywhere.

How to fast restore lastest backup data.
1. tap on Backup Restore Now icon to start application.
2. tap on Restore button to start restore data.
3. tap on OK button to confirm restore data.
4. after restoration complete dialog "Restore complete!" appear. restart phone to get your data back.

How to Restore your any backup data.
1. goto backup folder that you keep a backup file (*.brn)
2. tap and hold on backup file until popup menu appear .Select Openwith menu and choise Backup & RestoreNow.
3. for security and miss tapping you should not check on 'use this program to open' box. and tap on ok button. dialog "tap on backupfile again to confirm a restore process" will appear. tap on ok button to close dialog.
4. tap on OK button to confirm restoration. you 'll see message "Start restore your addressbook, sms, mms, and email, calendar and work."
5. after restoration complete dialog "Restore complete!" appear. restart phone to get your data back.

About Backup & Restore Now.
- It's only compress main.db, mms, and email folder by tar and gzip into MMC. so It's cannnot syncronize any data.
- It's may not work with backup and restore from and into diffenrent firmware or phone model.
you can find another here nowGoogle.com adalah Multiple Search Engine Popular

NO WARRANTY AND USE IT WITH YOUR RISK

Download
BackupRestoreNow_A1200_E6_1.2.zip
Posted on 11:32 PM / 1 comments / Read More

Modify Boot Image Hellomoto when phone power on

motorola boot imagesimple tutorial on how to modify rokr e6 or motorola A1200 (that call motoming) Boot Image Hellomoto when phone power on. Boot Image is a first image that appear before splash animation display when power on phone. It is a GIF 89a image encoded to smg file. pack/unpackBootImage.pl is perl scripts that use to packing and unpacking gif image from and into smg file.

Requirements.
1. Perl Interpreter from ActivePerl

How to unpack bootimage.smg to gif image.
1. rename cg file to bootimage.smg
2. put pack/unpackBootImage.pl into the same folder as bootimage.smg.
3. double click on unpackBootImage.pl to extract smg file.
4. 2 files should apprear in bootimage folder. bootimage.gif and cgversion.txt bootimage.gif is a gif image file. cgversion.txt is a text file that indicated version of your cg.

How to pack gif image to bootimage.smg
1. check in bootimage folder that It have bootimage.gif and cgversion.txt.
2. double click on packBootImage.pl
3. new bootimage cg file should be in new_bootimage.smg.

PS. you can get bootimage.smg from firmware by use sbf codec extract cg39 from E6 and A1200 f/w.

Download
BootImagePackager_1.0.zip
Posted on 11:38 PM / 1 comments / Read More

modding Sony Ericsson Jalou


gogling and googling and i found the SE Jalou (call)..
hmm..beatiful phone.

Sony Ericsson
announced the Jalou, their newest mobile phone featuring the latest in fashionable design. The typical technical specs are all there including 3G, 3.2 megapixel camera, Bluetooth, etc; but what sets this clamshell phone apart is a highly fashionable “bling” design, as one can see from the facet-cut diamond face. Not only that but a Dolce & Gabbana special edition will be available, featuring 24carat gold plating. just waiting for modding Sony Ericsson Jalou
Posted on 8:24 PM / 0 comments / Read More

Motorola Q registry tweaks - Update

this post an update from last moto Q tweak
You will need a registry editor like Resco Registry Editor and Explorer: Resco Explorer 2005 for Smartphone

And as with most posts of this nature, tweak AT YOUR OWN RISK!
need the Motorola Q USB Driver?? Just Download Here

The following is a list of mods/hacks that you will find thereafter:
1. Making the scrollbars smaller (Vert. and Horz.)
2. Moto Q Speed Increases
3. Changing System Startup Sound
4. Turn off Shutter Sound for Camera
5. Change Start Menu into List Instead of Grid
6. Shut Off the Beep that Occurs When You Initiate a Call
7. Page Up and Page Down in IE
8. Change VZW Image that is Above the # Dial Window
9. Change Startup Microsoft Splash Screen
10. Remove Sent Message Popup With SMS.
11. Increasing Call History

1. Making the scrollbars smaller (Vert. and Horz.)

This hack allows 4 icons on a row in the start menu instead of 3 and allows more to be viewed on the screen in IE:
• Go to: HKey_LOCAL_MACHINE\SYSTEM\GWE\
• Adjust the following values
cyHScr : Horizontal Scrollbars
Height in pixels (default is 6, set it to 3)
cxVScr : Vertical Scrollbars
Width in pixels (default is 6, set it to 3)
• Soft-reset


2. Moto Q Speed Increases


The following 2 hacks increase system performance and makes the Q more responsive:
• Navigate to: HKEY_LOCAL_MACHINE\SYSTEM\GDI\GLYPHCACHE\
Changed limit from 16384 to 32768
• Navigate to: HKEY_LOCAL_MACHINE\System\StorageManager\FATFS
Changed - CacheSize to 4096


3. Changing System Startup Sound
• Navigate to: \HKEY_CURRENT_USER\ControlPanel\Sounds
- At the very bottom of the list of entries, there an entry called AllSounds
- Open that up and you'll see a list of mp3 files.
- All you have to do is append your own audio files (mp3, wma, or wav) to the list. Then you have to make sure that you place your new audio clips in the \Windows folder so that they are accessible.
- The next time you go to the sounds events page, the drop down menu will contain the new clips you added.
• If you want to change the system startup sound, go to:
\HKEY_CURRENT_USER\ControlPanel\Sounds\SystemStart \Sound
- Change the hidden wav file, \Windows\Piano.wav to \Windows\MY_WAV_GOES_HERE.wav
- I'd be really cautious about changing the startup wav. You don't want the phone to lock if the audio file doesn't load. I converted my wav to 16bit, stereo, 22khz WAV file. I didn't use mp3 or WMA. This seems to work fine.


4. Turn off Shutter Sound for Camera
• Navigate to:
\HKEY_LOCAL_MACHINE\System\Pictures\Camera\OEM\Sou ndFile
• In the SoundFile key:
Modify the string/value \windows\shuttersound_02_secs.wav to say \windows\*none*
- Yes it should have the ** around none


5. Change Start Menu into List Instead of Grid
• Navigate to:
\HKEY_CURRENT_USER\Software\Microsoft\Shell\StartM enu
• Change the GridView value to 0 if you want list view.
• Change it to 1 if you want grid view.


6. Shut Off the Beep that Occurs When You Initiate a Call
• Navigate to:
HKEY_CURRENT_USER\ControlPanel\SoundCategories\InC all2
• Change String/Value InitVol to 0


7. Page Up and Page Down in IE


Key mapping for "Page Up" and "Page Down" in Internet Explorer
• Open your favorite registry editor then navigate to HKEY_LOCAL_MACHINE\Software\Microsoft\Internet Explorer
• Create a new key 'KeyMaps' (without the quotes)
• Under KeyMaps, create 2 new DWORD values:
50 with a value data 1 (this will make key "2" Page Up)
56 with a value data 2 (this will make key "8" Page Down)
- I created 2 more DWORD values:
52 with a value date 5 (this will make key "4" Page Left)
54 with a value date 6 (this will make key "6" Page Right)
The key name is the keycode you want. 50 = Key 2, 56 = Key 8, 52 = Key4, and 54 = Key
• Other DWORD values available are:
1 - Page Up
2 - Page Down
3 - Top
4 - Bottom
5 - Left
6 - Page Rignt
7 - Horizontal Top
8 - Horizontal Down
9 - Default Layout
10 - Desktop Layout
11 - One Column Layout
12 - Full Screen Toggle
13 - Show Pictures Toggle
Keycodes Values for 0-9: 48='0', 49='1', 50='2', 51='3', 52='4', 53='5', 54='6', 55='7', 56='8', 57='9'.
• Exit registry editor once you have mapped it to your favorite keys.


8. Change VZW Image that is Above the # Dial Window

When you go to dial a # you will see a Verizon Wireless Image above that #.


To get rid of this or to change it...

• Upload the desired image to /windows.
The default VZW image is 240x27. However the author, tonyxcom, says: "Oh, and you can pretty much make the image any size you want. I made mine 320. If you make it any less wide, it will get stretched."
• Navigate to:
HKLM/Software/Microsoft/Shell/Rai/:MSCdial/
Click on the String/Value BannerImage
You will see in the String: /windows/16_brick_131.gif
Type in the string field: /windows/YourImagesName.jpg
YourImagesName.jpg being the name of the file you put in the /windows folder in Step 1.

Someone named Ben Hirashima has an auto installing CAB file for this hack. It can be downloaded at Here


9. Change Startup Microsoft Splash Screen

The file that we are dealing with is "ms_screen.png". The system uses this file for both the startup and shutdown screens. There are 2 ways to do this mod. The first is to create another image file named ms_screen.png, and move it into your windows directory. Of course it will need to be 320x240, and I would save in PNG format just to be safe. Be sure to make a backup of the original just in case you happen to botch something.
The method that I chose was to create a PNG file, again 320x240, and save it under a different filename. Then, move this file into the Windows directory. Now it's time to edit the registry to point to this new file.

The registy keys are located at: HKEY_LOCAL_MACHINE\Software\Microsoft\Splash Screen
We are interested in the CarrierBitmap, MSBitmap, and MSShutdownBitmap keys. They point to the \Windows\ms_screen.png file by default. Change all 3 to the new filename, and restart the Q. You should see your new startup logo after the Verizon logo and animations, prior to your Home screen coming up.


10. Remove Sent Message Popup With SMS.
• Navigate to: HKEY_LOCAL_MACHINE\SOFTWARE\Microsoft\Inbox
• Next, click on Inbox (make sure the Inbox is highlighted) and select Edit, New Key
• Name the New Key as "Settings"
• Click on "Settings" (make sure the Settings is highlighted) and select Edit, New String Value
• On "Value name:", key in SMSNoSentMsg and in "Value data", key in 1
• Soft reset your device and test it with one SMS, and you will notice that the SMS Sent bubble is being disabled


11. Increasing Call History
• Navigate to: \HKEY_CURRENT_USER\ControlPanel\Phone
"CallHistoryMax" contains the number of numbers that will be kept in history. [ie. change it to 100]


[Here is one that I didn’t venture to try: ]

USB Native Tethering, Make DUN Settings Stick• To make the DUN setting (##342587) stick, do the following delete the following string value: HKey_Local_Machine\init\"Launch99"
• Exit regedit, dial in ##342587. Select OK, then Exit.
• Reset your Q.
Upon restart, the Modem Link app will be there indefinitely, lest you do the ##342587 again and disable it.
NOTE: Unless you take certain measures your phone can lock up 80% of the time.

Thanx Guys On The Forum
Posted on 11:59 PM / 0 comments / Read More

Make Full Flash with SE Tool 2 Lite

se tool 2 lite

Here is described, how to make a full flash with SETool 2 Lite and How to apply or remove patch. on sony ericsson

DOWNLOAD SE Tool 2 Lite 1.10 (you can Use Google to Find out)
Upgrade from 1.10 to 1.11:
SETool 2 Lite 1.10 to 1.11 update (you can Use Google to Find out)
USB Flash Driver (download here)

below is step to guide, so read carefully

1. Back-up your GDFS file and write your GDFS.

Quote:
Look to the left column and down you will see a button called “Read GDFS”. Click it, and then hold down the C button on your phone, and then plug in the cable. Eventually it will get to a point , where it says “PROGRAMMING FLASH”. Once it says Unplug the cable , then Unplug your phone, take the battery out, put the battery back in, hold down C, press the “READY” button, then plug the phone back in, BUT right after you plug it in, about 2 seconds after or so, release the C button. SETool 2 Lite will now read the GDFS and then it will say “Getting GDFS Chunk” , and then once it has fully read your GDFS, you can click “Quit”.Take the battery out for about 20 seconds, and then put it back in.

"Write gdfs" will write gdfs to phone in BINARY format. File selected in "MISC. Box" will be assumed as gdfs in binary format.
2. Flash your phone using SETool 2 Lite

Quote:
Step 1: Shut down your phone and open SETool 2 Lite.
Step 2: Choose your phone model.
Step 3: Press the ADD button and select the Main&FS files (.mbn & .fbn). MAIN and FS can also be bin files. In fact the only important thing is that, they're unencrypted.
Step 4: Select the archive with the customization files (.zip).After it is recognized by the program , in the left side will appear informations about the customization.The archive(.zip) contain files from tpa/preset/custom.
Step 5: Press the FLASH button.
Step 6: Connect the usb cable while holding down the "c" button un your phone. Then wait for the process to finish.
Step 7: Disconnect your phone , get the battery out for 5 seconds , reintroduce it and start up the phone.It will appear a screen with "Please Wait...", wait 1-2 minutes and then the phone will start normally.
se tool 2 lite

that is,, hope you enjoy and nice days
Posted on 12:47 AM / 0 comments / Read More

Rogers BlackBerry Curve 8520 Devices

Over at Howard Forums, Treatz has advised that the Rogers branded 8520'S have been sent to some store locations and the rest will follow thorugh out the week. If you're lokking to grab one of these ya may wish to give a shout out to your local Rogers location and see if they have gotten any in, if you're lucky they may just sell ya one before the actual launch date as Rogers isn't really known for keeping devices under wraps. This one will set ya back $99.99 with 3 year contract with voice and data promos $45 and higher, a nice entry level price which should drop even further after a while. Offical launch should be around October 9th.


Posted on 8:58 PM / 0 comments / Read More
modding Moto KRZR K1M

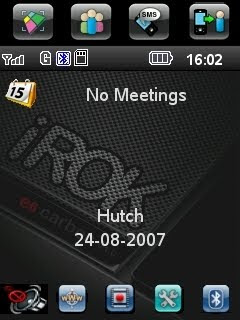
in this tutorial i will try to modding Moto KRZR K1M
let begin dear modder
1. Recognizing the phone


PART A)
After installing BitPim and Motorola Phone Tools, you'll want to plug in your KRZR K1M using the supplied Mini-USB cable.

Once plugged.in (teehee), windows will auto-detect/install needed drivers (if any). As soon as that is completed, open up MPT.


It will ask you to choose a profile (I used default, but it doesn't really matter). After you've chosen a profile (or created new), hit OK.

Now you will be asked if your K1m is connected through Cable, Bluetooth, or Infrared. Check in the cable and proceed.

MPT is now going to auto detect your phone like so,


After it has deteced the phone, a smaller version of your K1M should appear on your desktop and from there you are good to go.


PART B)
You'll want to first head to MotoModders and download the latest K1M drivers (I didn't and it still worked for me, however some people have had some problems).

After installing drivers you will want to open up BitPim

Now go:
Edit
-> Detect Phone
***If phone does NOT detect it will ask if you want to run settings. Click |Yes|

Change your settings to those below


Hit |Ok| and your phone should be detected.

Before closing BitPim, you'll want to go under the View tab and check off View Filesystem. This is what you'll be playing with from now on with BitPim.

Voila! We're done. Now you can start hacking your phone...


1. Getting Audio/Pictures to your phone a& setting them as Ringtones/Wallpapers

Step one: Open up MPT
Step two: Click on Multimedia Studio
Step three: Click on Melody Studio for audio, or Image Studio for images

Now you can edit/upload media files have stored on your pc.


Once you've uploaded all your files you can close down MPT.


*****To make audio files as ringtones you will need to do this step:
Now open BP, -> View Filesystem
Click on the plus sign on the folder in the Filesystem section (see pic)
Now delete the two files in the main folder named MyToneDB.db and TmpTneDB.db
After they've been deleted, reboot your phone and you will now be able to set those newly uploaded audio files as ringtones through the Ring Styles menu ONLY


2. Eliminating camera noise when taking pictures/videos

For this, you will be using BP

Step one: Simply create a new blank .wav file (see picture)
Step two: Rename it Shutter5.wav
Step three: Open up BP, -> View Filesystem
Step four: Open /motorola/shared/system (click on system folder)
Step five: Backup Shutter5.wav to wherever
Step six: Delete Shutter5.wav from filesystem
Step seven: Drap & Drop the NEW Shutter5.wav file that you created to the system folder
Step eight: reboot phone.


The static Telus logo that displays on the outside screen when the flip is open can be replaced the same way that you did the camera noise.
The telus.gif file is located at /mobile/TELUS.gif. Your picture MUST BE 96x80 pixels

The opening and closing gifs you see when you turn on the phone can also be replaced using the same method. Simply replace customer_opening.gif and customer_closing.gif you see in /motorola/shared/jbed/picture


Currently Testing:
-adding games
-setting ring styles to Vibe AND Ring


That's all for now.
I'll do my best to keep it up to date.

thanks for interesting in my post we'll see again on next modding


Posted on 10:12 PM / 0 comments / Read More

moto modder : [MP]Freedom 7FR [Mpkgbox + QVGA recording]

Freedom 7FR
Based on R6637_G_81.00.7FR + R6637_G_81.11.2CR Fixes

CREDITS

For this MP I would specially like to thank my friend Kidscracker, for helping me out on some things, backing me up on this project, and of course developing Mpkgbox, looking forward to working with you again Carlos
ilove3d for the original Mpkgbox that Kidscracker ported for use in this MP.
Second I would like to thank tankrider, Skrilax_CZ and NestorM for clearing up some doubts I had and giving me suggestions for this MP.
Then I would like to thank the Motorola modding communities on the net, especially ModMyMoto which is where I grew up and MMUS for taking me in as part of their team. Both communities very friendly and helpful, keep it up guys

Change log:

This MP was originally based on R6637_G_81.11.2CR
and it had a patched kernel that enabled swap, among some other features that are really only cosmetic. I decided to base this on R6637_G_81.00.7FR after it was discovered that it could record in QVGA. 7FR Camera libs won’t work on 2CR and while trying to make them work I ended up with a huge mess and other things started breaking. So I decided to base it on 7FR, unfortunately however, The custom kernel from 2CR will not run 100% well with 7FR, if it is flashed this way the wifi stops working. So I made a came to the conclusion QVGA was more important than a custom kernel with swap, therefore this firmware does NOT have SWAP capability. Im sure you guys will understand. If someone can get there hands on 7FR Source code please let me know so I can patch the kernel as this source is not available on Motorola’s site due to 7FR being a developers release.

CG36 Mods:

* MPKGBOX
* QVGA Recording
* Telnet&FTP (Modem&Tools)
* Run Scripts from File Manager
* Unrar and Unzip from File Manager
* Show* Modules
* Removal of certain modules to increase firmware speed

Extras:

*
* Custom Bootscreen
* Skins: Alkali, Kodak, Indium, Tuscan (Indium is not present in 062A version)


Instructions

1. Use RSD Lite 4.x for all flashing
2. Flash noRSA bootloader that corresponds to your bootloader
3. Flash the version of Freedom 7FR that corresponds to your bootloader


Posted on 1:04 AM / 0 comments / Read More

Moto Q Registry Tweak


Hey guys...I’ve discovered a resource of Motorola Q mods and hacks…registry tweaks…what have you… that you may find valuable to your Q-using experience and wanted to pass it along. You will need a registry editor like Resco Registry Editor and Explorer: Resco Explorer 2005 for Smartphone

And as with most posts of this nature, tweak AT YOUR OWN RISK!

for Application your Moto Q click Here

The following is a list of mods/hacks that you will find thereafter:
1. Making the scrollbars smaller (Vert. and Horz.)
2. Moto Q Speed Increases
3. Changing System Startup Sound
4. Turn off Shutter Sound for Camera
5. Change Start Menu into List Instead of Grid
6. Shut Off the Beep that Occurs When You Initiate a Call
7. Page Up and Page Down in IE
8. Change VZW Image that is Above the # Dial Window
9. Change Startup Microsoft Splash Screen
10. Remove Sent Message Popup With SMS.
11. Increasing Call History

1. Making the scrollbars smaller (Vert. and Horz.)

This hack allows 4 icons on a row in the start menu instead of 3 and allows more to be viewed on the screen in IE:

• Go to: HKey_LOCAL_MACHINE\SYSTEM\GWE\
• Adjust the following values
cyHScr : Horizontal Scrollbars
Height in pixels (default is 6, set it to 3)
cxVScr : Vertical Scrollbars
Width in pixels (default is 6, set it to 3)
• Soft-reset


2. Moto Q Speed Increases
The following 2 hacks increase system performance and makes the Q more responsive:

• Navigate to: HKEY_LOCAL_MACHINE\SYSTEM\GDI\GLYPHCACHE\
Changed limit from 16384 to 32768
• Navigate to: HKEY_LOCAL_MACHINE\System\StorageManager\FATFS
Changed - CacheSize to 4096

3. Changing System Startup Sound
• Navigate to: \HKEY_CURRENT_USER\ControlPanel\Sounds
- At the very bottom of the list of entries, there an entry called AllSounds
- Open that up and you'll see a list of mp3 files.
- All you have to do is append your own audio files (mp3, wma, or wav) to the list. Then you have to make sure that you place your new audio clips in the \Windows folder so that they are accessible.
- The next time you go to the sounds events page, the drop down menu will contain the new clips you added.
• If you want to change the system startup sound, go to:
\HKEY_CURRENT_USER\ControlPanel\Sounds\SystemStart \Sound
- Change the hidden wav file, \Windows\Piano.wav to \Windows\MY_WAV_GOES_HERE.wav
- I'd be really cautious about changing the startup wav. You don't want the phone to lock if the audio file doesn't load. I converted my wav to 16bit, stereo, 22khz WAV file. I didn't use mp3 or WMA. This seems to work fine.

4. Turn off Shutter Sound for Camera
• Navigate to:
\HKEY_LOCAL_MACHINE\System\Pictures\Camera\OEM\Sou ndFile
• In the SoundFile key:
Modify the string/value \windows\shuttersound_02_secs.wav to say
\windows\*none*
- Yes it should have the ** around none

5. Change Start Menu into List Instead of Grid

• Navigate to:
\HKEY_CURRENT_USER\Software\Microsoft\Shell\StartM enu
• Change the GridView value to 0 if you want list view.
• Change it to 1 if you want grid view.

6. Shut Off the Beep that Occurs When You Initiate a Call
• Navigate to:
HKEY_CURRENT_USER\ControlPanel\SoundCategories\InC all2
• Change String/Value InitVol to 0
7. Page Up and Page Down in IE
Key mapping for "Page Up" and "Page Down" in Internet Explorer

• Open your favorite registry editor then navigate to
HKEY_LOCAL_MACHINE\Software\Microsoft\Internet Explorer
• Create a new key 'KeyMaps' (without the quotes)
• Under KeyMaps, create 2 new DWORD values:
50 with a value data 1 (this will make key "2" Page Up)
56 with a value data 2 (this will make key "8" Page Down)
- I created 2 more DWORD values:
52 with a value date 5 (this will make key "4" Page Left)
54 with a value date 6 (this will make key "6" Page Right)
The key name is the keycode you want. 50 = Key 2, 56 = Key 8, 52 = Key4, and 54 = Key
• Other DWORD values available are:
1 - Page Up
2 - Page Down
3 - Top
4 - Bottom
5 - Left
6 - Page Rignt
7 - Horizontal Top
8 - Horizontal Down
9 - Default Layout
10 - Desktop Layout
11 - One Column Layout
12 - Full Screen Toggle
13 - Show Pictures Toggle
Keycodes Values for 0-9: 48='0', 49='1', 50='2', 51='3', 52='4', 53='5', 54='6', 55='7', 56='8', 57='9'.
• Exit registry editor once you have mapped it to your favorite keys.

8. Change VZW Image that is Above the # Dial Window
When you go to dial a # you will see a Verizon Wireless Image above that #.
To get rid of this or to change it...

• Upload the desired image to /windows.
The default VZW image is 240x27. However the author, tonyxcom, says: "Oh, and
you can pretty much make the image any size you want. I made mine 320. If you
make it any less wide, it will get stretched."
• Navigate to:
HKLM/Software/Microsoft/Shell/Rai/:MSCdial/
Click on the String/Value BannerImage
You will see in the String: /windows/16_brick_131.gif
Type in the string field: /windows/YourImagesName.jpg
YourImagesName.jpg being the name of the file you put in the /windows folder in Step 1.

Someone named Ben Hirashima has an auto installing CAB file for this hack. It can
be downloaded at: http://benhirashima.com/hostedFiles/DialPad.CAB

9. Change Startup Microsoft Splash Screen

The file that we are dealing with is "ms_screen.png". The system uses this file for both the startup and shutdown screens. There are 2 ways to do this mod. The first is to create another image file named ms_screen.png, and move it into your windows directory. Of course it will need to be 320x240, and I would save in PNG format just to be safe. Be sure to make a backup of the original just in case you happen to botch something.
The method that I chose was to create a PNG file, again 320x240, and save it under a different filename. Then, move this file into the Windows directory. Now it's time to edit the registry to point to this new file.

The registy keys are located at: HKEY_LOCAL_MACHINE\Software\Microsoft\Splash Screen
We are interested in the CarrierBitmap, MSBitmap, and MSShutdownBitmap keys. They point to the \Windows\ms_screen.png file by default. Change all 3 to the new filename, and restart the Q. You should see your new startup logo after the Verizon logo and animations, prior to your Home screen coming up.

10. Remove Sent Message Popup With SMS.

• Navigate to: HKEY_LOCAL_MACHINE\SOFTWARE\Microsoft\Inbox
• Next, click on Inbox (make sure the Inbox is highlighted) and select Edit, New Key
• Name the New Key as "Settings"
• Click on "Settings" (make sure the Settings is highlighted) and select Edit, New String Value
• On "Value name:", key in SMSNoSentMsg and in "Value data", key in 1
• Soft reset your device and test it with one SMS, and you will notice that the SMS Sent bubble is being disabled

11. Increasing Call History

• Navigate to: \HKEY_CURRENT_USER\ControlPanel\Phone
"CallHistoryMax" contains the number of numbers that will be kept in history.
[ie. change it to 100]

[Here is one that I didn’t venture to try: ]
USB Native Tethering, Make DUN Settings Stick

• To make the DUN setting (##342587) stick, do the following delete the following
string value: HKey_Local_Machine\init\"Launch99"
• Exit regedit, dial in ##342587. Select OK, then Exit.
• Reset your Q.
Upon restart, the Modem Link app will be there indefinitely, lest you do the
##342587 again and disable it.
NOTE: Unless you take certain measures your phone can lock up 80% of the time.


Posted on 10:50 PM / 1 comments / Read More

Moto Modding : Menu Item EM3


SIMPLE MENU EM30, as well...

Step By Step

Before replacing any files be sure to backup the originals!!!
Please uninstall any applications installed, before continuing...
or else you won't find them in the games n apps menu...
Be sure to download the correct ver. for your flash...

Works on EM30 only... Not to be tried on an E8...

Items added: File Manager, Themes, Camera, Notes and Connections...

You can download it from HERE


Just copy the grid.svg file to your 'Other' folder
/ezxlocal/download/mystuff/Other

AND, also copy UserMenuTree to:/ezxlocal/download/appwrite/am


*For aiyin_singlspark_3D_71.03.06R:


Works on EM30 only... Not to be tried on an E8...

Items in Menu: Contacts, Messages, Music, Recent Calls, Games, Multimedia, Office Tools, FM Radio,
Mobile Internet, Settings, MpkgBox, Thems, Camera, Notes and Connections...

You can download it from HERE
Just copy the grid.svg file to your individual skin's 'svg' folder:
For EM30- /mmc/mmca1/skins/any_skin/svg

If you do not have a 'svg' folder, then create one inside every skin's folder. Name it as 'svg' without qoutes...

The skin not having this file, will only display 10 items in main menu, when it is applied...

You need to copy grid.svg to all skin's 'svg' folders- any_skin1, any_skin2, etc... to display 15 items all the time...

AND, also copy UserMenuTree to:
/ezxlocal/download/appwrite/am

DO NOT USE P2KCOMMANDER TO DO THIS!!!


Posted on 10:49 PM / 1 comments / Read More

Flashing/Upgrade Motorola Rokr E2

We figured out that the description in the firmware section "Flash using RSD lite" is not enough for newbies, so we decieded to write a unified tutorial for flashing Motorola ROKR E2. Here is what you need to do:
1. Firsr review the flash file. When you unzip the archive usually you will find only two files - one is .shx and one is .sbf file. First you will flash the .shx and then you will flash the .sbf.

2. Turn off your phone. Press the Voice Key + Red Key. You will get the primary bootloader screen. Now start hitting the voice key multiple times until the bootscreen text changes and you will see the secondary bootloader.
3. Connect your phone, open RSD Lite and flash your phone with the .shx file (in some firmwares there is only one .sbf file - choose it here)
4. After the flash is complete then you can turn your phone into the primary bootloader again and then flash it using RSD lite. Here you may need to follow additional instructions from the firmware post itself (like replacing some .smg files during the flash). However that is optional

Source :MotoModder

Posted on 8:28 PM / 2 comments / Read More
 
Copyright © 2011. Hellomotto . All Rights Reserved
Home | Company Info | Contact Us | Privacy policy | Term of use | Widget | Blogger Nusantara Blogpreneur Indonesia